We've all been there girls. You've got your Kim Kardashian smokey eye all perfectly applied and blended and all the look is lacking is a nice pair of falsies to complete the look. Unfortunately, this is easier said than done...
You coat the lash band with a thin strip of duo glue and carefully grab them in the center with your tweezers, even opting for the glue that dries clear(despite the intensity of the liner)just to be on the safe side. After the token 20 seconds has passed to allow the glue to get tacky you carefully lower the lash band down on top of your own lashes only to discover that, despite your caffeine deprivation, your hand shook at just the right moment to somehow smear that tacky glue halfway down your eyelid. "No worries", you think. "The glue dries clear so no one will notice.", and you carry on applying. But, soon you discover that the glue that has now become translucent on your lid was necessary to adhere the band to your lash line. The lash won't stick. Disaster ensues. Sound familiar?
That's why I am making this post. I have recently discovered a new way to apply my false lashes that is way more comfortable(no more tight feeling lash lines and dry eyes), looks more natural, and doesn't require a bit of eye liner! This will include pictures because I really want you guys to be able to notice a difference and try it out for yourselves. I find it way easier. So break out the lash glue from wherever you buried it after your last lash tantrum and let's do this thing!
Here's everything you'll need:
 |
| Please excuse my grubby duo tube. |
- A small pair of scissors
- Lashes of your choice(preferably invisible band)
- Tweezers
- Lash Glue
Take the outer piece of lash with your tweezers and coat the band of the lash with a thin strip of glue. Allow the glue to get tacky for 20 seconds but no longer than that or it will not stick. If it takes longer than 20 seconds your have applied to much glue. Wait for the glue to dry completely and remove it by pinching the lash band between your fingers and gently pulling it off. Then, simply reapply the glue thinly.
Gripping the lash piece in your tweezers use a finger from your non-dominant hand to gently hold your eyelid up slightly(just like you'd do for eyeliner)and, looking down into a mirror, gently place the lash onto the waterline as close to your lashes as possible. With the opposite end of the tweezers or a clean finger/cotton swab gently dab the lash band onto the waterline to secure into place. Make sure you allow it to dry completely before curling or anything else. Then simply repeat the process working your way in! Here are some pictures to compare and give you a closer look. I apologize in advance for the extreme close up:
 | ||
| On the left are my natural lashes and on the right is with the falsies. Sorry my hair is frizzy. |
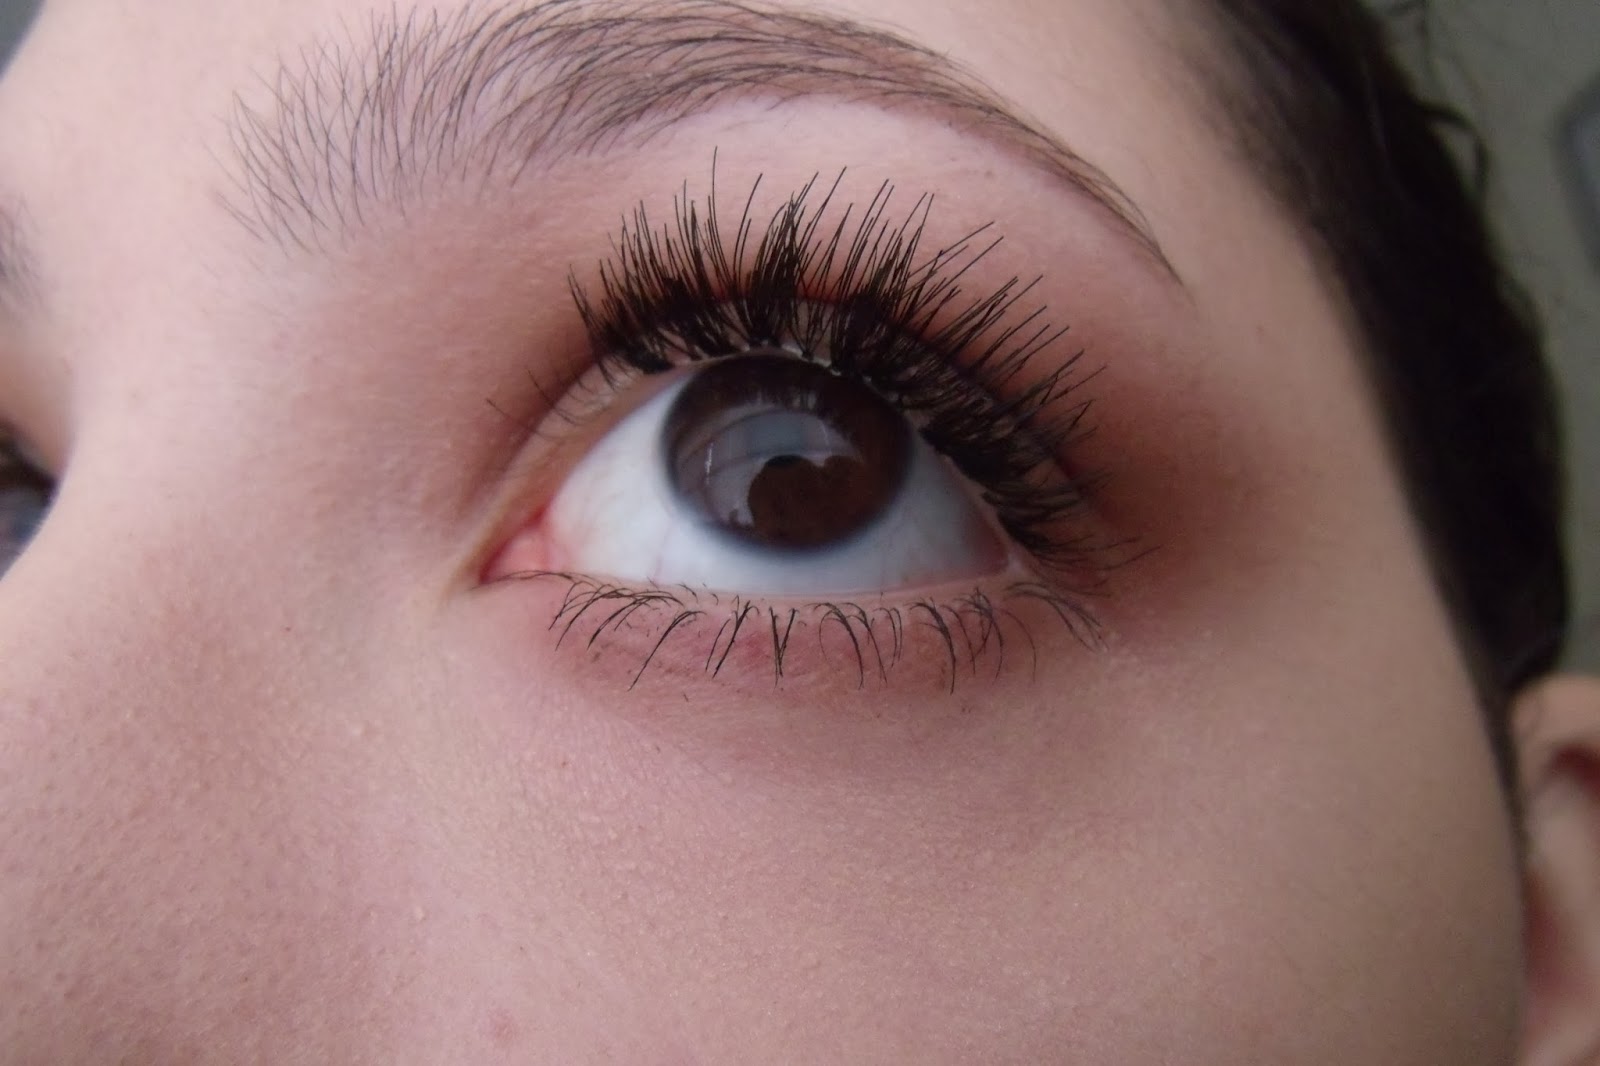 |
| Here is a shot close up to show you what it looks like on the waterline. |
 |
| And here is with both eyes done. The result is really natural looking because it seems like they are just growing out like your own lashes do. Invisible falsies! |